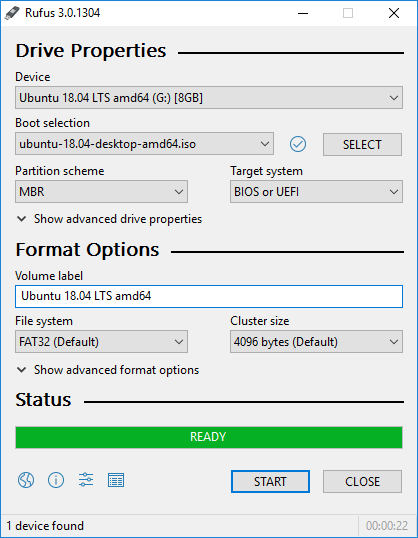
Rufus is a tool designed to create a bootable flash drive. You can use Rufus to extra the content of an ISO file to a flash drive and make it bootable. This is useful for laptops that did not come with a CD/DVD-ROM drive
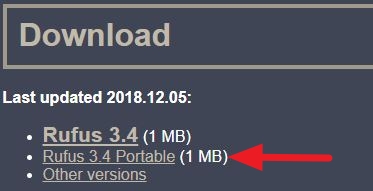
Click here to visit the official website and download a copy of the tool. I recommend downloading the portable version (see screenshot below)
How to use Rufus
1. Open the Rufus program by double-clicking on it. If a window appears and asked "Do you want to allow this program to make changes to your computer" click on Yes
2. Once Rufus has been opened click the drop-down arrow under Device and select your USB drive
3. Under Boot selection make sure Disk or ISO image (Please select) is displayed in the box and click on the button SELECT to the right of the box. Locate your ISO file and click Open

4. Under Partition scheme select MBR and for the Target system set it to BIOS (or UEFI-CSM)
5. Under Format Options you can name your flash drive anything you want. I left mine as default.
6. Under File system select NTFS and leave the Cluster size as default.
7. Under Advanced format option, you can just leave this as default as well.
8. Click on the START button. A warning window will appear and tell you that ALL DATA on the drive will be erased, click on OK and wait for Rufus to extract the ISO onto your USB flash drive.
9. After it is done with extracting the ISO file to the USB drive you can eject the flash drive by clicking the up arrow in the right corner of the screen, locate the flash drive icon and click on it. Once prompt click on Eject USB Flash Drive.
10. Once it is done ejecting the drive, you can remove your flash drive and plug it into another computer to boot from it.


0 comments:
Post a Comment